No-Bake Protein Peanut Butter Cups: Your Simple Solution for Sweet Cravings
Imagine biting into that perfect combination of rich chocolate and creamy peanut butter, but without the guilt, without the high sugar content, and with an added boost of protein. Sound too good to be true? Not anymore! Welcome to the world of **protein peanut butter cups**, a delectable, no-bake treat that effortlessly transforms your favorite candy into a wholesome, macro-friendly indulgence. Whether you're a fitness enthusiast looking for a post-workout snack, a busy individual craving something sweet yet healthy, or simply someone who loves peanut butter cups, this recipe is about to become your new best friend. These homemade delights are not only incredibly easy to make with common pantry staples but also pack a nutritional punch that will keep you feeling satisfied and energized.
The Sweet Secret: Why Protein Peanut Butter Cups Reign Supreme
For many, the allure of chocolate and peanut butter is irresistible. It’s a classic pairing that evokes comfort and nostalgia. However, traditional store-bought versions often come loaded with sugar, unhealthy fats, and artificial ingredients, turning a simple craving into a caloric compromise. This is where the magic of **protein peanut butter cups** comes in. By incorporating protein powder, we elevate this classic treat from a mere dessert to a functional food that supports your health and fitness goals.
Why is protein so vital? Protein plays a crucial role in muscle repair and growth, keeps you feeling full for longer, and helps stabilize blood sugar levels, preventing those infamous energy crashes. Adding it to a sweet treat means you’re not just satisfying a craving; you’re fueling your body. The "no-bake" aspect is another game-changer. Forget preheating ovens or complex baking techniques. This recipe is designed for maximum convenience, allowing you to whip up a batch in minutes, making it perfect for meal prep, spontaneous snack attacks, or a quick, healthier dessert after dinner.
Gathering Your Guilt-Free Ingredients: What You'll Need
One of the beauties of this recipe is its reliance on simple, often already-on-hand ingredients. You'll be amazed at how a few wholesome components can come together to create such a delicious and satisfying treat.
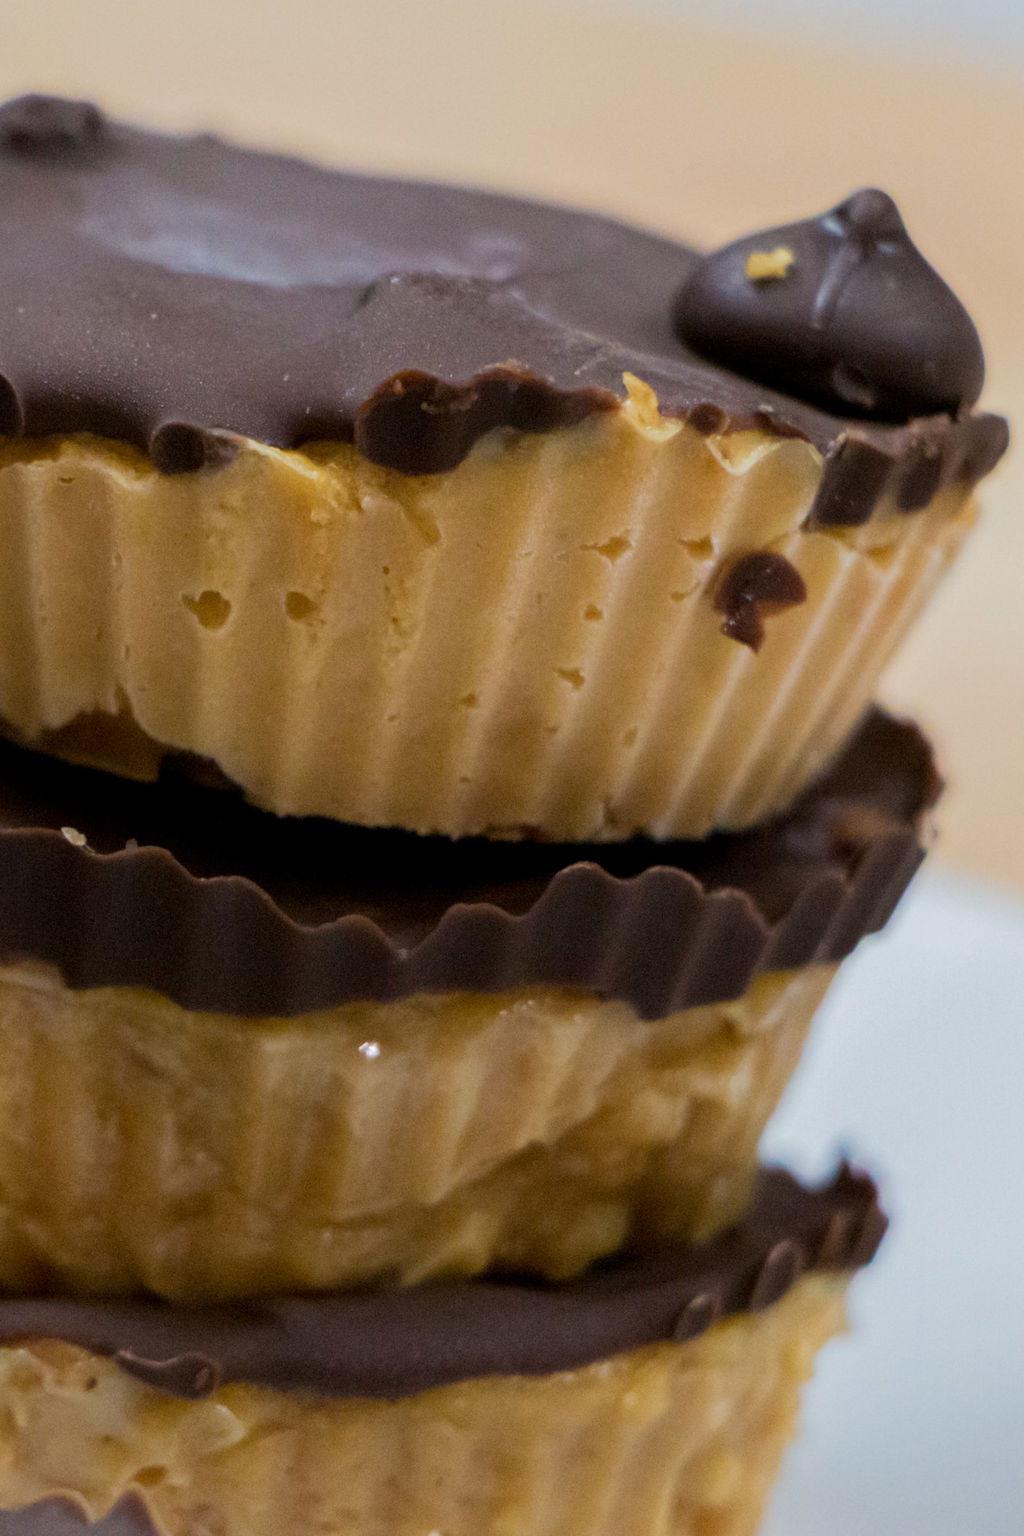
- Peanut Butter: The star of the show! Opt for a natural, unsweetened peanut butter with minimal ingredients (just peanuts and perhaps salt) to avoid added sugars and oils. Almond or cashew butter can also be fantastic alternatives if you have dietary preferences or want to experiment with different flavor profiles.
- Sweetener: Maple syrup or honey works wonderfully, providing natural sweetness and a hint of depth. If you're mindful of sugar intake or following a low-carb diet, sugar-free syrups (like those made with erythritol or monk fruit) are excellent substitutes that maintain the flavor without the added calories or carbs.
- Protein Powder: Vanilla protein powder is highly recommended for its versatility, blending seamlessly with the peanut butter and chocolate. Both whey and plant-based protein powders (like pea or soy protein) work well. Just be aware that plant-based options might yield a slightly denser texture. Feel free to experiment with chocolate protein powder for a double chocolate peanut butter cup experience!
- Milk or Milk Substitute: A splash of milk (dairy or non-dairy like almond, oat, or soy) helps bind the mixture and achieve the right consistency. Choose your preference based on taste and dietary needs.
- Vanilla Extract: A crucial flavor enhancer that elevates the overall taste profile, adding warmth and depth to the peanut butter base.
- Salt: Especially important if your peanut butter is unsalted. A small pinch of salt balances the sweetness and enhances all the other flavors, making the chocolate and peanut butter truly sing.
- Coconut Flour (Optional but Recommended): This is your secret weapon for perfecting the texture. If your peanut butter mixture seems too wet or sticky after combining, a tablespoon or two of coconut flour will absorb excess moisture and help achieve that desirable "sandy", crumbly consistency.
- Chocolate Chips: Dark or semi-sweet chocolate chips are usually preferred for their richness and slightly lower sugar content compared to milk chocolate. For a truly decadent experience, you can even use sugar-free chocolate chips.
- Coconut Oil (Optional for Chocolate): Adding a tiny bit of coconut oil to your chocolate chips before melting helps achieve a smoother, glossier chocolate coating that sets beautifully.
Crafting Your No-Bake Masterpiece: Step-by-Step Guide
Creating these irresistible **protein peanut butter cups** is surprisingly simple and requires minimal equipment.
Mixing the Peanut Butter Base
- Combine Wet Ingredients: In a small mixing bowl, combine 1/2 cup of your chosen peanut butter, 2 tablespoons of syrup or honey (or sugar-free alternative), 1 ounce of milk or milk substitute, and 2 teaspoons of vanilla extract. If using unsalted peanut butter, add 1/2 teaspoon of salt now.
- Add Protein Powder: Gradually add 2 scoops of vanilla protein powder to the mixture.
- Mix Until Combined: Stir everything together thoroughly. An electric mixer can make this process quicker, especially if you're making a large batch or find peanut butter tough to mix by hand. The goal is a uniform consistency.
- Achieve the Perfect Texture: Your mixture should have a slightly gritty, "sand-like" texture – combined but not completely smooth or sticky. If it feels too wet, add coconut flour, one tablespoon at a time, mixing until you reach the desired consistency that can be easily pressed without sticking to your hands. This step is crucial for the perfect **protein peanut butter cups**.
Preparing and Filling the Cups
- Choose Your Liners: Silicone cupcake liners are highly recommended for this recipe. Their flexibility allows you to easily peel them away from the finished cups without damaging your creation. Paper liners can also work, but removing them might be a bit trickier.
- Arrange on a Baking Sheet: Place your chosen liners onto a baking sheet or any flat tray that can easily be transferred to the fridge or freezer. This makes the chilling process much simpler.
- Distribute the Base: Evenly divide your peanut butter mixture among the liners. The amount will depend on how many cups you want to make and your desired thickness. For cups roughly twice the size of a standard Reese's, aim for 8-10 cups. For smaller, more traditional sizes, you might get 16-20.
- Press and Compact: Use your fingers or the back of a spoon to firmly press the peanut butter mixture into each liner, compacting it and creating a flat, even top. This usually takes just 10-15 seconds per cup. The "gritty" texture of the mix prevents stickiness, making this step surprisingly easy.
Melting the Chocolate & Finishing Touches
- Melt the Chocolate: In a microwave-safe bowl, combine 1/4 cup of chocolate chips (and a tiny bit of coconut oil if using, for extra smoothness). Microwave in 30-second intervals, stirring well after each, until the chocolate is fully melted and smooth. Alternatively, you can use a double boiler on the stovetop: place a heat-safe bowl over a pot of simmering water, ensuring the bowl doesn't touch the water, and stir until melted.
- Top Your Cups: Spoon approximately 1/2 tablespoon of melted chocolate over the top of each peanut butter base. Use the back of your spoon to gently spread and smooth out the chocolate layer, ensuring it covers the entire surface. You should have just enough chocolate for all your cups.
- Optional Toppings: For an extra gourmet touch, sprinkle a tiny pinch of flaky sea salt on top of the wet chocolate before it sets. This enhances the flavors beautifully.
- Chill to Set: Transfer the baking sheet with your newly formed **protein peanut butter cups** to the refrigerator for at least 30-60 minutes, or the freezer for 15-30 minutes, until the chocolate is firm.
- Store & Enjoy: Once set, transfer your protein peanut butter cups to an airtight container. They can be stored in the refrigerator for up to a week or in the freezer for up to 3 months. When enjoying from the freezer, let them sit at room temperature for a few minutes to soften slightly.
Elevate Your Experience: Customization & Smart Snacking
The beauty of homemade treats lies in their adaptability. While the basic recipe for **protein peanut butter cups** is outstanding, there are countless ways to customize them to suit your palate or dietary needs.
Customizing Your Protein Peanut Butter Cups
- Flavor Variations: Swap vanilla protein powder for chocolate for a double chocolate peanut butter cup. Mint chocolate protein powder could create a festive twist, or even a cinnamon flavor for a warming spice note.
- Mix-ins: Fold mini chocolate chips, chopped nuts (like walnuts or pecans), shredded coconut, or even a sprinkle of chia seeds into your peanut butter base for added texture and nutrients.
- Toppings Galore: Beyond flaky sea salt, consider a drizzle of melted white chocolate, a sprinkle of rainbow sprinkles (for a fun birthday treat!), or finely chopped roasted peanuts on top of the chocolate layer before it sets.
- Dietary Adjustments: Make them vegan by using plant-based protein powder, dairy-free milk, and vegan chocolate chips. For gluten-free, simply ensure all your ingredients (especially protein powder) are certified gluten-free. For a low-carb version, use sugar-free syrup and sugar-free chocolate chips.
Smart Snacking: When to Enjoy
These versatile **protein peanut butter cups** aren't just for dessert. Their balanced macros make them suitable for various occasions:
- Post-Workout Recovery: The protein helps repair muscles, while the fats and carbs offer sustained energy.
- Mid-Day Energy Boost: A perfect alternative to sugary processed snacks when that afternoon slump hits.
- Healthy Dessert Alternative: Satisfy your sweet tooth without the guilt of traditional candies. For another take on recreating that classic taste, explore our recipe: Taste Like Reese's: Easy High-Protein Peanut Butter Cups Recipe.
- Meal Prep Staple: Make a batch at the beginning of the week for easy access to healthy treats. If you're looking for more ways to make your favorite candy healthier, check out our guide on Homemade Protein Peanut Butter Cups: Your Favorite Candy, Healthier.
Conclusion
Say goodbye to store-bought candy cravings and hello to your new favorite healthy indulgence! These no-bake **protein peanut butter cups** are a testament to how simple ingredients, combined with a little creativity, can transform a guilty pleasure into a nutritious, satisfying treat. Easy to make, packed with protein, incredibly customizable, and tasting remarkably similar to the "real thing," they offer a perfect balance of flavor and function. So, gather your ingredients, follow these straightforward steps, and empower yourself to enjoy the sweet harmony of chocolate and peanut butter, guilt-free, any day of the week. Your taste buds and your body will thank you!